Showing posts with label making. Show all posts

Saturday, 11 July 2015

Room for improvement: reversible bedroom cushions

I'm starting a new occasional series on the blog today. It's called 'Home Improvement'. What is it and why?
  • Our house is in a permanent state of un-finished-ness (yes I know that's not a word!) I want to feel it's done. I want to feel proud of it.
  • We never have time to decorate, and we certainly never have the money. I want to move it up our priority list, and this series will act as a motivator. I want to be more creative with what we have and where we source things.
  • I love to make and to sew and I do it for my job, but I would love an excuse to sew more for our home. I want to have at least one thing I've made in every room.
I plan to tackle one room at a time, and give myself (or, let's be honest, ourselves, since I'll be roping my husband in) one month for each room. They won't always be completely finished by then (far from it), but they can certainly be improved. Hence, Room for improvement.

I'm starting properly with August in our youngest's bedroom. But until then, I've dipped my toe in the water with some new cushions for our bedroom. I love these prints and didn't want to sew and give them away. And I needed to time myself making cushions. So they became a sneaky project just for me!

Sewing just for me! Yes, it's both my husband's and my bedroom but he would never say "Do you know, we really need some cushions," so it was definitely a selfish project. I was inspired by Things for Boys' #selfishswap and though the deadline was the end of June, I haven't got around to photographing and blogging these until now.

What do you think? The good news, or the bad news depending on how you look at it, is that I'm inspired to sew a whole load more for our room.

For those who are interested, I recovered the chair in Raindrop Poppies Bronze from Anna Maria Horner's Field Study line and blogged about it here. I made the cushions mostly using fabric from The Village Haberdashery, one of my most favourite online fabric stores. The fabrics, top to bottom (in the picture below) are... well I shouldn't have said top to bottom as I can't remember the first one! But I really love those Arabic-looking trees, so do tell me if you know. After that, it's Lizzie House's Pearl Bracelets in cosmonaut, Hothouse Flowers Seeds in pink, and Michael Miller's Brambleberry Ridge Flight in gold & white.


Home Etc


Tuesday, 7 July 2015

Crafting with Kids: home-made thank you cards in 3 quick & easy steps!


So this is the way it goes it my house: child has birthday. Child receives birthday presents. Child needs to send thank you letters. Mother keeps forgetting. It was the Little One's birthday in early June and now the month's been and gone I've really got to get these 'thank you' cards sorted!

It's important to me that those people who were kind and generous enough to give a present get a meaningful thank you in return. That means different things to different people, but to me it means a handmade thank you card.

It is also important to me that I don't give myself yet another huge 'to do' on top of everything else, and that writing 'thank you's' is not something my children dread as a chore. You can see the colourful 'thank you' cards my Tiny One made after his birthday here. But I can't do the same thing with the Little One (their birthdays are two months apart and my aunties would remember!).


Which brings me to...

Step one: Find an appropriate picture your child has made, or get them to make one. I used a Star Wars picture my six year old made for his Star Wars party but it would've been more sensible to find one on a white background. Of course, you can keep a coloured background but I was being thrifty and avoiding caning through all that yellow ink!


Step two: Scan and upload your picture. Now, if you have photoshop like me, you can white out the coloured background and add some text (I used a free Star Wars font that I downloaded). If not, get your fabulously helpful child to make you a bespoke picture and write 'thank you' etc on it. Using photoshop or your programme of choice, multiply that photo into four on an A4 sheet. You could do this using a photo mosaic programme too.


Step three: Print the photos out on thick paper stock, cut up and use! (Here's where it gets a bit tricky as you have to get your six-year-old to neatly write their name over a dozen times!)

Helpful? If you want more specific instructions on how to do this on photoshop (it took me less than half an hour), do let me know!
The Twinkle Diaries

Wednesday, 26 March 2014

Making: a quick & easy DIY thread necklace

So here's what happened, in order:
- Firstly, I spent a fortnight doing DIY in the bedroom at every possible moment. This meant no sewing. A week of no sewing and I get really desperate to get back to it. A fortnight? The unspent creative juices were threatening all kinds of mayhem.
- I read Monica's post about her quick necklace making. It struck a chord. It hid around in the recesses of my mind waiting for a moment to pounce.
- I had fifteen minutes the next day before going to collect the Little One from school. Fifteen minutes at the end of the day for which my main plan had been do some sewing and my achievement had been do no sewing. There was a broken necklace in a pot by my sewing table. There was some bright darning thread/yarn in my box. There were fifteen minutes.
Ta da! Fifteen minutes very well spent. I love the bright pink-red thread (though I think it's going to get pretty fluffly pretty quickly). And the once forgotten, now re-loved beads. It was just what I needed. A little happy makery to conclude the day.

The bedroom, by the way, is finished!!! Well, there's still a floor to paint at some point and a whole lot of upholstery to sort out. But the walls, ceiling and woodwork are all done. Applause! Curtsey!

Monday, 11 February 2013

Making: Felt stars and circles garland

Do you find that there's always one Christmas decoration that you can't bear to put away and end up keeping all year round? I do. This year, this was it.


I just cut out, free-hand, lots and lots of circles and stars from thick, quality felt. Then, being Christmassy, I threaded my needle with green thread and my bobbin with red, and began sewing through them all. I just fancied a bit of colour in the windows and now that Christmas is but a memory, that colour gilds the back wall of our playroom/sewing room instead.
 
I couldn't live without it now.
 
PS It's been a little quiet around here lately. I'm feeling a little pffed (make the sound, go on, then you'll know what I mean), a little lacking in inspiration. The days keep passing and they're dragging me by. I hope to take up the reins again some day very soon.

Wednesday, 9 January 2013

Making: Christmas presents for children

Hello friends.

Christmas is very over. So over that the decorations are boxed up, the tree keeps staring at me from the ginnel* and making me feel guilty (I feel like I have 'tree murderer' tattooed on my forehead), and I've started thinking about next Christmas! Oh, you don't do that too? Time to bow my head in shame and skulk into the corner.
 
But if you do think of the next Christmas to come, and all the things you meant to do this year and didn't get around to, then I'll show you some of the childrens' presents I made. In fact, they're great things to make for birthdays all year round, so let's forget the embarrassing pre-pre-Christmas planning and show you some pictures...
 
I made this monster drawing tote for a friend's little boy. Don't you just love the crayon teeth?! Sadly, I can't take the credit as I saw a similar bag on pinterest and decided to make my own version. Here's the original, made by Marigold of Hideous! Dreadful! Stinky!
But then, feeling pretty inspired, I decided to make a monster-less pretty bag as well. I used some lovely Jemima Puddle-Duck fabric. All the bags I made have a sketchbook inside that I made just the way you did back in primary school - thick thread, running stitch down the spine to hold the pages together, hey presto!

The totes are fully lined (in a brushed-cotton baby blanket that once wrapped all three of my boys in turn) and came together in an hour or two. The felt crayon pockets took quite a while on top of that though, although annoyingly I've now seen that the original monster bag tutorial (which I hadn't seen at the time) has a much easier and quicker way to sew them. File that for next time!
 
I have more pictures to show you (the Christmas that keeps on giving) but they can wait until next time. 
 
*Ginnel: northern term meaning a passageway between houses

Thursday, 3 January 2013

Making: Christmas presents for friends

I thought I'd divide my Christmas making up into three posts: for friends, for children, and for family. I'd love to say I had a clever reason why. I just don't have photos of the family gifts yet, so I'm stalling.
 
Firstly, I know this is slightly bonkers in a 'I'm Pretending I'm a Perfect Mamma' kind of way, but we made our own wrapping paper. Kraft paper (cheap! tasteful! rare combination!), green paint, a big potato and two very messy kids. That's the Tiny One's hands there (not so tiny any more). And mine. I was going for the nice geometric tree print. The Tiny One was going for the wahey-let's-rub-that-green-potato-tree-everywhere look. He won.
Secondly, here are the bags I made for three special chums. I'd like to point out that this was my first time using a zip and it was just the same experience as my first time making souffle - came out fine, couldn't work out what the fuss is about. I think it was more luck than skill. But I love them. That mauve bottom left is from a corduroy dress from Clothkits that I wore at about age 6. I'm a sentimentalist, I know it.
I asked my friends for their favourite colours, which is how I ended up with these prints. All the bags were made using this pattern from Noodlehead. The blue print is from Amy Butler's Soul Blossoms range - Temple Tulips in azure. The whole sheet of fabric looked beautiful draped over my sewing chair. I think it would be fabulous in a large-scale upholstery project. The yellow fabric is one I've used before for a hanging wall pocket, but I can't find a photo of the project or a picture of the fabric online, so it'll have to remain mysterious. I love how autumnal it is and the contrast of such a spring-like interior.
I'm really pleased with those interiors. They really take the bags up a notch. I used the same prints for the zip tags. I keep having to remind myself to say 'zip' - I read so many American sewing blogs that I keep starting to say 'zipper'.
I also made this fabric necklace, inspired by this pin of a // Between the Lines // project. Hers is much better though. I planned to make one for each of my friends but ran out of time - sorry ladies, IOU!
Inside each bag was a felt single-string Christmas mobile in the colours of their Christmas decorations. Here are two. I really like them, even though they're simple. They looked lovely hung from my front window while they waited gifting, and I could quite happily have kept them.
That's me done for now. I had a sore throat yesterday, a terribly sore neck today, and I think a lurgy may be lurking. My mum and auntie are coming tomorrow (hooray!) so now I need to go and finish up some sewing and clean the bathrooms (not hooray).
 
PS I'm thinking of redesigning my blog again and going back to the old-school, scroll-down-for-each-post look. What do you think?
 

Thursday, 22 March 2012

Organising the pretties

Spring cleaning, spring sorting, spring organising. I seem to have had it worse than ever this year (or better, depending on how you look at it). Much of it has been quite practical and very satisfying. But organising needn't be utilitarian and dull. I have also been organising the pretty things in life too. And voila:
And here is a close-up:
I have been looking for a pretty but practical way of storing my earrings for ages. Here's what you need to do, should you be equally inspired...
  1. Find yourself some broderie anglaise style fabric. Lace would also do. You need it to be in long lengths, and, crucially, you need it to have holes in it that are just the right size to easily slip an earring through, and for a stud earring with a butterfly clip on to stay clipped in (if the hole's too big, they'll slip right off!)
  2. Cut the broderie anglaise into lengths that are right for your space and your earring collection. Tip: cut longer than you need! Nothing's more annoying than buying more earrings and finding you've got to get rid of old ones to fit them in to your display. (Also, this is a perfect excuse to 'need' to buy more earrings.)
  3. Pin your fabric onto your wall. I used clear noticeboard pins and a hammer. Unfortunately I also used my building-obsessed Little One who hammered so enthusiastically he broke the ends off a few pins! Use your eye or a spirit level to get your fabric straight. If you are setting more than one length of fabric on the wall (as I did), make sure the lower length is parallel to the upper one and that the spacing between the two is enough to allow your longest earrings to hang without overlapping.
  4. Add additional pins to the fabric as well as the ones at each end. This helps to support the weight of your earrings. My two strips of broderie anglaise are about half a metre long and have 4 pins in each.
  5. Get hanging and clipping your earrings in! If you have an unfortunate mix of mild OCD and an artistic eye like me, hang them in colour groups. Scarily satisfying.
  6. You may find, as I did, that the weight of the earrings causes the upper section of your fabric to warp (you can see this slightly in the top picture). I used clear sticky dots behind the worse sections to hold the fabric to the wall.
  7. Ta-dah! I am unashamed to admit that the sight of my pretty earrings all lined up, pretty and colour coordinated cheers me up every morning.

Thursday, 12 January 2012

A list for 2012

I am a little list-obsessed. Having written one for what I'd achieved (or otherwise) in 2011, I feel I ought to set myself a bit of a plan for 2012. You could call these plans resolutions, but they're a little less stern than that. Intentions, maybe?

  • Family - They are always top of my list. And though there are eight other items below this one, I will try to remember not to resent the time I spend giving to my family when I may have had hopes to be working on one of my other 'intentions'. My husband is my rock, my heart and my home. I am still giddy about him, eight years in; and so I hope to still have butterflies this year. My boys are my joys and, as we struggle through adolescence, potty training and emerging willfulness with each in turn, I hope to keep counting my biggest blessings, one, two, three. Last but no means least, my parents and brothers. Absence has made the heart so much fonder. They have given so much to me, and I hope to rebalance the scales in 2012.
  • Writing - My soul is type-written. 2011 brought me back to it, and I hope to take it for a long walk in 2012. I'd like it to be read more, for my voice is not mute. Hence the blogging. Will I write anything else than the blog this year? I hope so, but I'd like to let that idea jiggle around in my mind for a while before I set any specific goals.
  • Sewing - I was in the flush of new love in 2011. In 2012 I'd like to build a long-term relationship with my sewing machine. Sew, sew, sew more. Sew gifts. Sew for others. Sew for me. Sew for the house. Sew quilts for the boys. Sew to sell. Learn, learn, learn more. By the end of the year, I'd like to have had my own stall and opened an etsy or folksy store. We can but dream.
  • Cooking - Well I've always loved this, but I want to make more myself (especially since the revelation of processor-made pastry) and more for the littlest boys. And I'd love to delegate the stove to the Big One one night a week, since he shows the kernel of such enthusiasm. But I have yet to ask him!
  • Baking - The problem with cake-making is it lead to cake-eating! So I hope to bake more for others to eat, and bake more savoury goods (I have dreams of a breadmaker, since my tiny hands and wrists are too wimpish for regular kneading). And gosh darn it, I will get my piping bag out of its packaging and decorate a cupcake before the year is out!
  • Making - Keep making my cards, and actually get good at it! If I could make them on time, well that'd really be something. Make more decorations to mark the seasons, celebrations and patterns of the year. And of course I'll be making my gifts, but that's covered under 'sewing'.
  • Nesting - This house, just over a year in, needs some window-dressing! It was home from the moment we first turned the keys in the door. The painting can wait (no time). The rotting window frames can wait (no money). But the odd cushion, quilt or curtain will, I hope, have the same effect as a blush of red lipstick on an un-made-up face.
  • Nature - Get my footprints in more mud, paths and trails. Get my head in more wind, sky and weather. Convince the Little One to walk in the rain! Bring the outside inside more - my vases look embarrassingly naked too much of the time.
  • Nurture - I will nurture my family (see first point!). I need to nurture my friends more. There has to be time to pick up the phone. My close friends are like sisters to me now, and, surrounded by boys as I am, I need more of their oestrogen in 2012. And to nurture myself? Is there time?! If there ever is, I hope to use it wisely. And to read a book, what luxury!
I hope we all make it to the end of 2012, and that I can look back and above all else find I was happy and I made others happy. And if I've found my vocation (sewing? writing?) and found a way to make a living from it, then so much the better.

Monday, 19 December 2011

11 days til Christmas

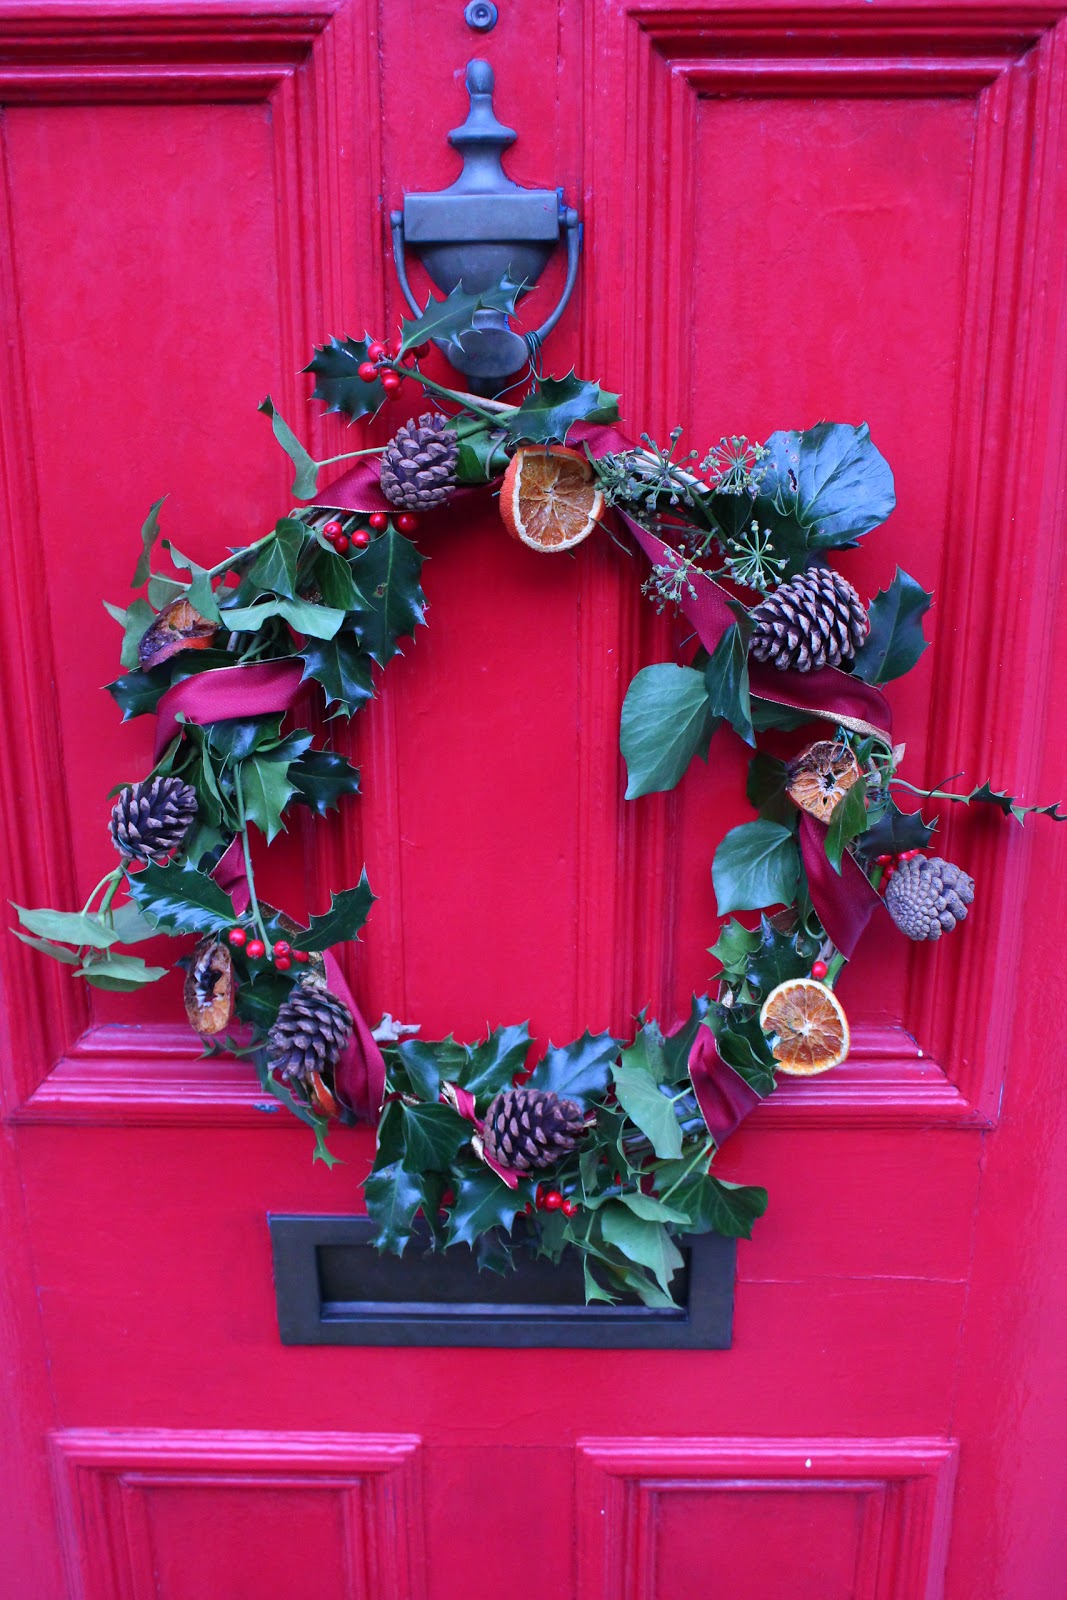
When there were eleven days to go, my lovely, lovely mum and I made this...
... and, oh!, I am in love! Generally I'm not too keen on my red door, but at this time of year it comes into its own. Isn't the wreath beautiful? Don't you love the colours? And best of all, my mum and I made it together which was so nice at the time, and keeps on giving every time I look at it. (But I'm not sure our post lady is too keen: the prickly holly is precariously close to the letter box!)

My mum made me the wicker wreath base last year, but after Christmas had passed. She brought up holly, ribbon, pine cones and dried orange slices from her home down south. We cut the ivy from our garden. Then, to the interesting mix of Christmassy 50's tunes and a sprinkling of 'ouch's', we stabbed our fingers with the holly as we wrapped and fastened it all on.

In other news, the Christmas lists are getting quite impressive. Present lists are half-populated with things already bought or made (I know, that other half is scarily blank for eleven days to go). Card lists are full but waiting to be brought to life. The decorations list is growing as I read more ideas from Dottie Angel. The Christmas food list has a title and nothing else, so it's time to get reading my Nigella Christmas book. But at least the turkey is ordered!

Sunday, 11 December 2011

Sewing softies

I have been making toys. I hadn't done it before, and I worked from my imagination rather than patterns. But they went quite well. I think I have the bug!

I made this horse for a friend's little girl. Her name begins with 'H', hence the horse. There's a theme here, and I got a little carried away!
Then I added ribbons for the ears, hair and tail as I know from my own Tiny One that ribbons, labels and the like are pretty irresistible to babies. I'm hoping they get very soggy.

I think I have a thing for buttons myself. They keep appearing on bags, toys and all sorts when I sew. I think they make rather lovely eyes. Don't you?


The first toy I made was this winking cat, for a little boy who's name begins with a 'C'. Yes, there's the theme again.

My Little One was a bit perturbed by his lack of legs, but if you've ever looked at a sat pussy, you'll see his lower legs merge somewhat. So I am unperturbed!

I am actually rather chuffed with the blanket stitch. I haven't done it since primary school. Yes, I am revealing what a novice, make-it-up-as-you-go-along sew-er I really am. But I don't mind. Admitting my sewing innocence seems to inoculate me from the self-berating I would otherwise get for all my mistakes.

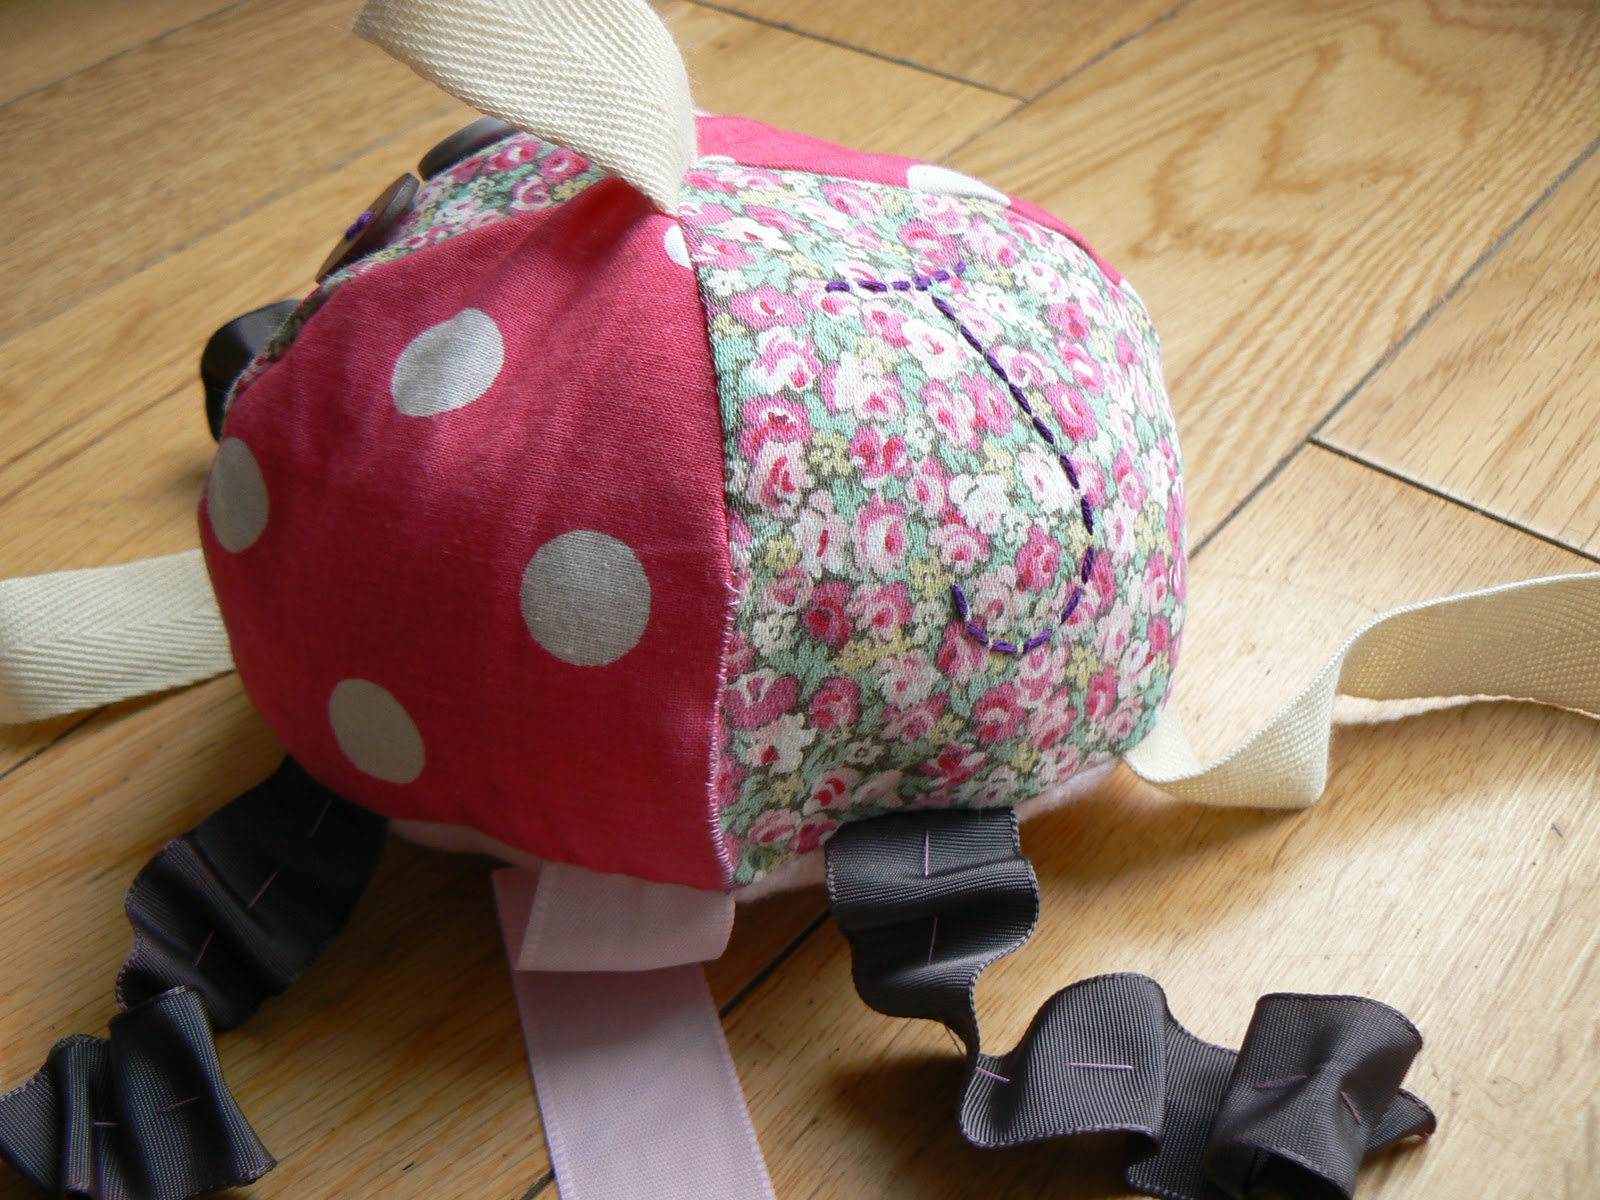
Lastly let me show you my favourite, the jellyfish. It's a gift for a baby whose name begins with 'J'. Let me tell you, there are not many well-know 'J' animals.

I got the idea for the tentacles from some amazing decorations in my local John Lewis, where all their fabrics had been jellyfished like giant umbrellas with multiple, squirmy tentacles.

I'm rather pleased. I think she looks quite friendly and satisfied for a jellyfish, and quite fun for a baby to look at. Her underside is a lovely soft fleece.
By the way, I know it is nearly Christmas and I have barely mentioned it. I am glorifying in it as usual, but I am completely unprepared and disorganised and so, until I am both, I am ignoring it a little. At least on the blogosphere. But I do hope to show you something very soon.

Thursday, 21 July 2011

A little art, please

This is not the first time I've admitted to being 'slowly efficient', but here I go again, showing you our decorated window from May (yes, again, I know it's July!). It was for our village's childrens' books themed May Queen celebration. Recognise her? It's Matilda. I so enjoyed painting her. I wish I'd had a little help, but the Big One thinks he's too old for this sort of creative venture, and the Little One is still at the stage of (very artistic) scribbling. Matilda is close to my heart - I was always a little bookworm, and liked to fancy myself as a potential intellectual genius when I was reading the book (I was an eight-year-old with delusions of grandeur).

I wish I could tell you I look at this picture only with pride, but all I can see right now are my depressingly under-loved window boxes. I'm just about keeping my head above water with the mothering, housework and sewing/blogging/baking adventures. There is no time for my poor neglected garden! I have dreams of tumbling nasturtiums but that will have to wait til next year.

And yes, I know, the windows and ledge need painting too. You should see my list of things to do. I think I shall rename it my 'list of things that will never get done'.

Friday, 20 May 2011

Things you missed... March cards


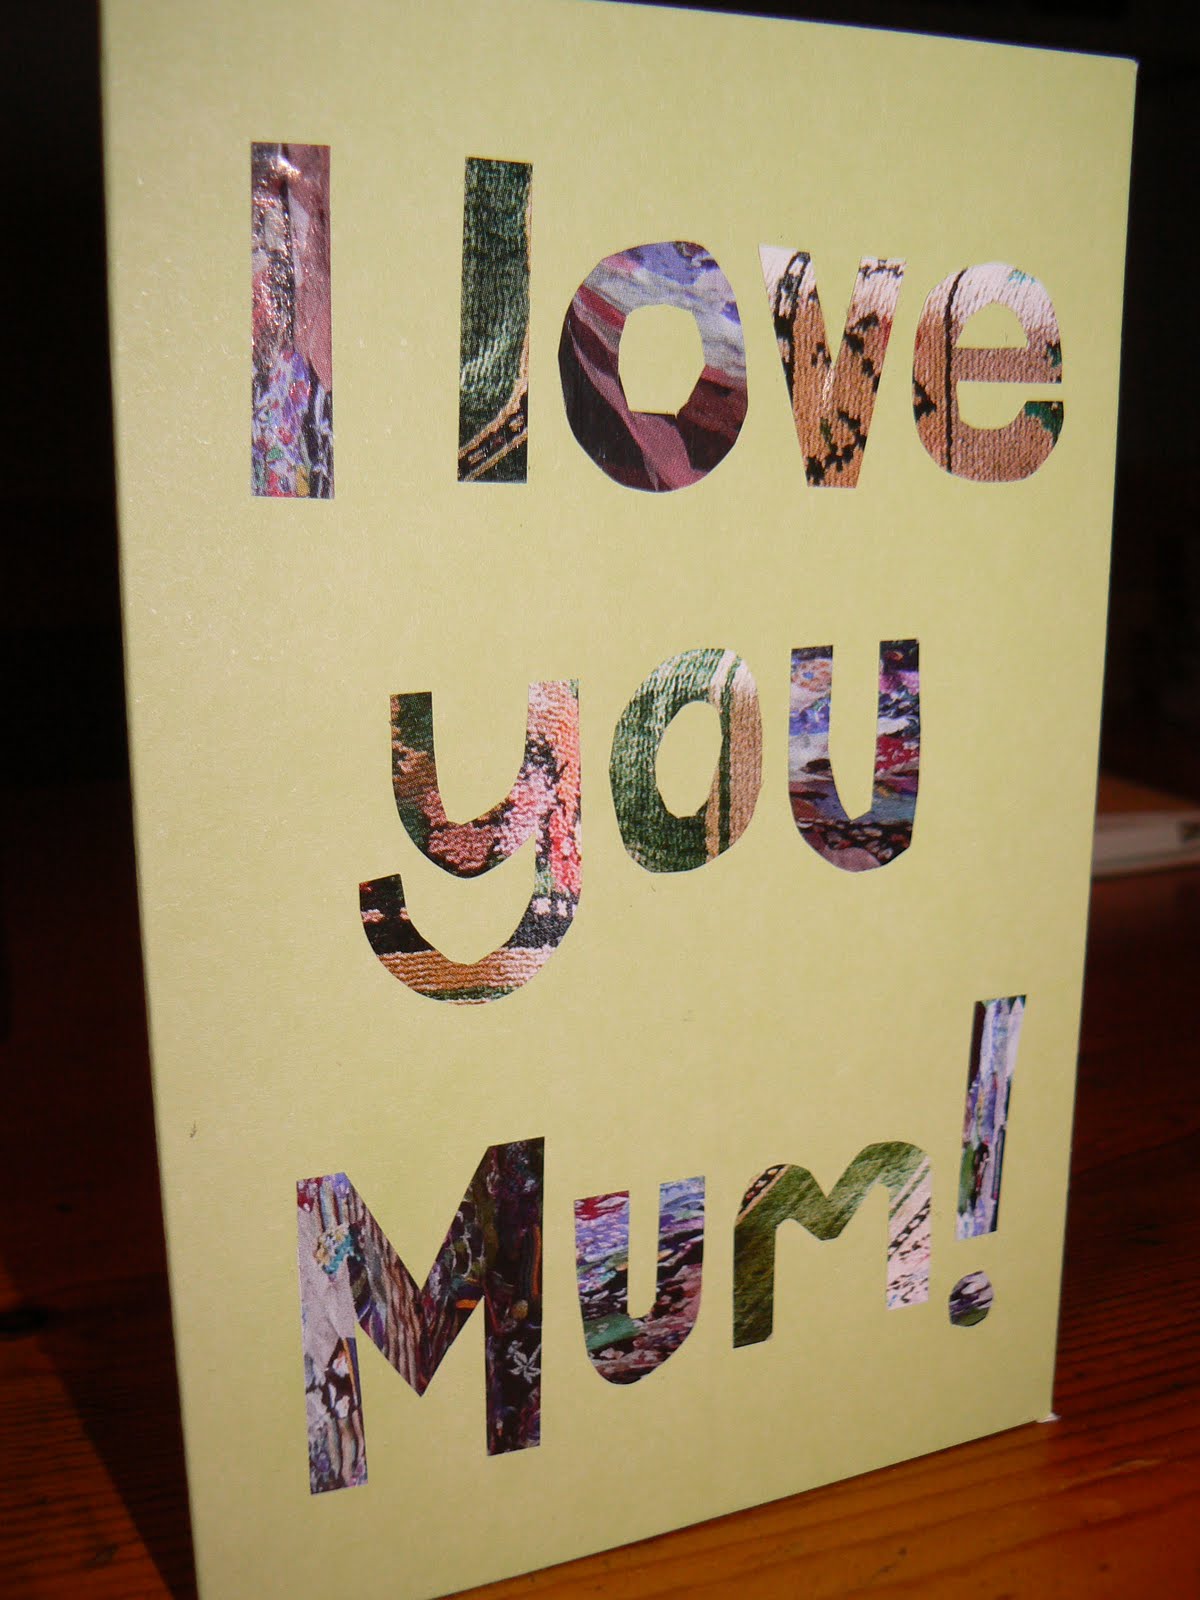
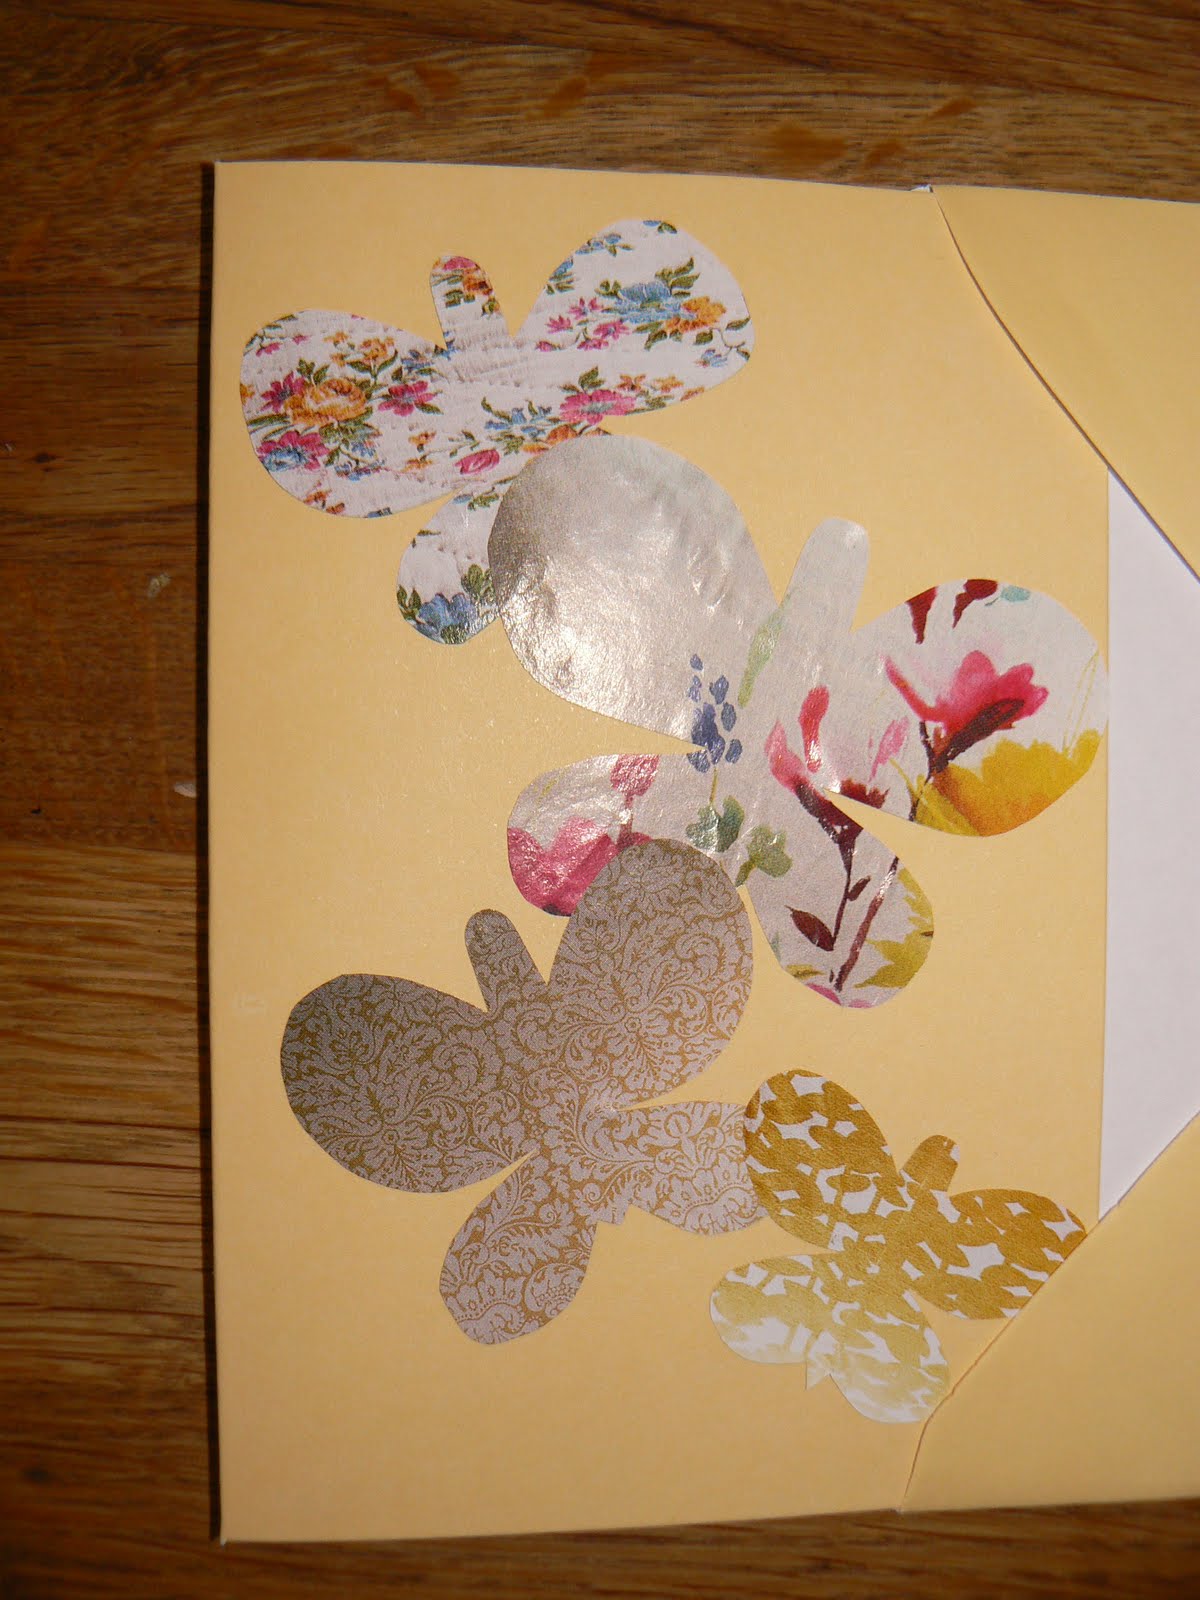
March was a bit of a card-making frenzy, because I knew I'd be out of action in April with the Tiny One on his way. I've shown you some already, but here are those you missed. The three above were made using magazine-page collaging. I like playing around with the colours and patterns to find those that complement. I think the letter cards work best in this format, but I quite like the stylised house I made for my parents' anniversary (it's supposed to look a little like their white house on the river). But is the collage technique a bit of a cop-out? I've been so afraid of making my own art (I was good at age 18. Reader, I lost it. Being good at drawing is not like riding a bike, but like learning a language - show me anyone a decade on from GCSE French who can manage more than a smattering of words and phrases). Maybe I've just been using someone else's art and rearranging it?

With this in mind, I have moved onto collage with colour blocks, ideally suited to a train-loving and dinosaur-loving twosome who turned two in March and April, respectively. It feels a little more like I am the artist when making this style of card (though that's a very glorified title for someone sitting at the kitchen table with glue, sugar paper and the merest sprinkling of creativity).

Prior to this year, I'd not made a card since childhood. This year of card-making was, to be honest, inspired more by lack of money than abundance of inspiration, talent or creativity. But it's brought me a little feeling of each member of this triumvirate. And it's brought me back to my childhood. I think as adults we can lose our ability to play - our creative tinkerings - and I know I had certainly lost mine. Cards are such little things. And yet they send thoughtfulness and caring to their betroved; and yet they require some of that artistic triptych of inspiration, talent and creativity. But they are little enough not to be daunting in time taken or effort required. And for a shy, retired, lapsed artist they are the perfect way to dip my toes back in.

Tuesday, 15 March 2011

Sewing project no.2!

I thought I'd show you sewing project no.2... chuffed to bits with it, though of course I can also see what I could've done better. It is a bag I made chiefly from Clarke & Clarke fabric for the birthday of one of my best, loveliest, kindest, beautifulist (sic) friends. So it needed to at least try and be as lovely as she.

Nice? I am so pleased with it. Didn't have a pattern but I seemed to manage okay. Postives & negatives?
  • Everything lined up!
  • Really liked my idea to embellish the bag with the two strips of ribbon and the contrasting buttons. It makes it a bit more individual.
  • I managed neat stitches in parallel lines.
  • I also managed neatly hand-sewn buttons.
  • This friend is a bit of a champion baker and lover of old-fashioned tea crockery, so the fabric was a good find.
  • Turning the handles out - oh my goodness, how laborious and difficult. I read somewhere about making handles and that there is a special tool for doing it. I think I need that tool!
  • Tension problems again, but the satisfaction of fixing them.
  • Didn't quite manage to get it done in time - it arrived a day late. But the pressure of a deadline can detract from the enjoyment of sewing so I had to balance the two.
Thanks to my clever husband by the way, for the photos.


Wednesday, 9 March 2011

Starting the week with some making, baking, sewing & happiness

Beautiful spring sunshine and a Monday morning getting the chores done (the joy of vacuuming) left me feeling optimistic and eager to get on with some projects!

I made some cards on Monday evening, only one of which I can show you as the others have yet to make it to their destinations. A good friend of mine had a little girl, so I made her a little collage card. I'm really enjoying the collage technique for my cards. As a teenager I was pretty good at drawing but I've discovered it's not like riding a bike - having held the knowledge of my talent so smugly within, I tried a decade later to draw again only to find I can't. Cue depressed self-loathing. And so I think I need a bit of collaging before I venture into the frightening world of the pencil again.

Then came the glorious spring sunshine on Tuesday morning, to which my little garden crocus in its regal purple - and no longer solitary - responded with thanks. As did I! It's like it's petals were clenched shut against the chill of winter's last breath, and then opened with a little 'aaah' of relief. It's also been joined by a lot more garden growth and the hellebore lower down in the garden has sprung back to life. We've only been here for six months so I feel a little guilty calling these plants 'mine', but since I've inherited them I think they could do with a little loving and stewardship. I have a weekend of gardening coming up (complete novice) with my wonderful mum (not at all a novice). More to follow!
On Tuesday afternoon, the Little One slept for an unexpected and glorious two hours! Out came the sewing machine, the fabric for a couple of children's presents, the mug of green tea and a very satisfied me! It's been lovely to feel that the sewing is coming more easily now, and that although I'm still not following patterns, I'm feeling more competent at working out what to do and how. These fabric pieces frayed after pre-wasing. They will become bags, but worried about wear-and-tear, I've made each bag side its own turned-rightway-round sealed unit (there must be some technical language for this that I should be using - feel like all I can manage is gobbledegook) so that when I sew them together there's no way they'll fray apart with use. Don't you just love the Hungry Caterpillar pattern?! I adore Eric Carle's illustrations.

And when the Big One came home from school on Monday, we hurriedly made rhubarb muffins from an internet recipe to use up some slightly wizened rhubarb. Good texture, but too much vanilla and too little sugar. I think they'll taste better with a bit of thick yoghurt for breakfast. I did make a yummy Nigella Moroccan chicken stew on Tuesday night though, with double quantities so that there was a meal to freeze for post baby-number-three.
Oh, and pancakes! Followed Ruth's tips on the Pink Whisk, but probably should have done something fancy and exciting to post to the blog. The problem is, I'm such a sucker for lemon & sugar. And we've had quite a few Scotch pancake recipes recently. Maybe next year!

Saturday, 5 March 2011

My first sewing project - bunting

The first present that came up in this year of making was for our friend's little girl, who was turning two. I needed a sweet, lovely gift for a sweet, lovely girl. What was a novice seamstress to do? Bunting didn't seem too difficult to do but could be personalised and made with a little love (!) so I headed off to John Lewis for the essentials and off I went, minus a pattern, and eventually came up with this:

It's three pieces of pink gingham with three pieces of floral cotton, hemmed, sewed onto a length of binding, and then four felt letters sewn on. I felt quite impressed with myself! But more than that, what I really gained was the enjoyment, excitement and challenges of the sewing project itself. I found out that I could definitely like this sewing thing.

The highlights and lowlights of the experience were:
  • I made it without a pattern, but still managed to do alright. I thought, being a little perfectionist, that I would be the sort of sewer that followed patterns. But it turns out I quite liked the freedom of finding my own way and seeing where the cloth took me.
  • I had a nightmare with the tension. Firstly, I didn't know what tension was! Once vaugely understood, I realised I had it wrong but myriad attempts to correct it with a more proficient sewing chum only seemed to make matters worse. I tried to hold face in front of her but I really felt like crying with exasperation by the end - not like me! It showed me how much emotion I had invested in this sewing expedition. What was great though was that I managed - on a cooler, calmer day - to rectify the problem by myself and go on to finish the job.
  • I also managed to figure out the tension differences required for the flimsy gingham and the thicker fabric.
  • I had planned to hand stitch the letters on with a more homely-looking blanket stitch (although I've not blanket stitched since I was about seven). Time worked against me though, so out came the sewing machine again. I quite like the results (you can see it on the 'i' below).
  • I had a really lovely response from the little girl's parents. Firstly they thought the bunting was bought, which made me feel a little less amateur, and then they were so appreciative of the effort involved. It was such a lovely feeling, so much better than giving a well-sourced bought present.
  • And there was so much I got out of the process myself - yes there had been moments of intense frustration, and times when I felt overwhelmed, but overcoming the challenges and feeling I was making something so lovely felt so good. I think I could get a little addicted to this.