Showing posts with label presents. Show all posts

Tuesday, 14 April 2015

Sewing: a windmill zoo reading cushion, for my tiniest four-year-old boy

front side windmill patchwork reading cushion, featuring Alexander Henry 2D Zoo fabric

reverse side envelope reading cushion cover, Alexander Henry 2D zoo

I don't know if I'm allowed to gush about my own work. Am I? But I just love this cushion so much. It's 65cm square, using a cheap cushion pad from Ikea that's not very puffy - on purpose. I didn't want a big squidge of a cushion that you roll off of. I wanted a nice big flattish square that you sink into and look at books, build train tracks, and colour pirate ships on. And all of those things have been done.

The blue stripy fabric is thrifted. The yellow dots are Art Gallery Chromatics Pointelle in yellow, bought from Celtic Fusion Fabrics. And all three zoo prints are different colourways of the lovely Alexander Henry 2D Zoo which I adore and had shipped over from Fabricworm in the US (couldn't find it in the UK at the time) a couple of years ago for the Tiny One's bed quilt.

The cushion was a gift for the Tiny One's fourth birthday. Four, people. Time just keeps marching forward, doesn't it? He is such a sunshiny boy: bright and sparky, joyful and warm. I love him to the sun and back, and even further than that. There were so many times before I got to hold him in my arms, four years ago, when we thought we had lost him. And there were times when he was small and I was so, so afraid that he had lost me. I just feel so lucky now that we're both here, part of this family, all loving each other and getting to stride forward into the future. It's why I'll never say 'I wish he could stay this little', because I know how lucky I am to be here, watching him growing up.

Saturday, 10 August 2013

Sewing: sea quilt

For a long time now, I've promised I'd show the quilt I made my parents. I made it last year, but only now did we get round to photographing it.
I call it the sea quilt. It's just about a king-size: 200cm by 220cm, or, with a bit of rounding up/down, 80" by 85". It's made in a wonky brick wall design (I'm sure there must be a proper name for it!), and I quilted it in freehand waves in pale blue thread. It's pale blue on the back, too. Let me tell you, it isn't easy manipulating a king-size quilt in the seesaw motion you need to get wave after wave. Though I love it, I'm not sure I'd do that again! 
I used a mixture of fabrics, some from my local textile mill shop, that sells remains, end-of-lines and seconds. Fabric addicts among you will recognise some of Lotta Jansdotter's Bella collection (Scandi Flower and Pebble Lines), some Pure Scandi (Dandelions), Shore Line (Kelp) and Kasuri Blossoms. I bought all these from Fabric Rehab, a misnamed store if ever I heard one - I am quite the opposite of rehabilitated since shopping there!
It is a fairly simple quilt to an expert's eye, but not at all to mine. It lies on my parents bed now, parents who have given me more love, care and help than you'd think could be possible. I like that it now warms and covers them, a little thank you whispering goodnight at the end of every day. 
Home Etc

Saturday, 29 June 2013

Sewing: tool roll

Let's unwrap this and have a look, shall we?
I made my dad and brother a tool roll each from a thick, brushed cotton. They're narrower at one end than the other, allowing for the tools to be placed in according to length. Each tool loop is slightly different in width and tightness. The top and bottom of the roll fold over the tools so they don't fall out when wrapped and carried. The central tool store are has medium-weight interfacing inside.
 
I made them for Christmas! There was neither time nor brain cells left to photograph them at the time, so my brother took these photos of his tool wrap for me to show you.
 
(I can't tell you how good it feels to sew something for a man that he actually wants, he really needs and is genuinely useful.)

Wednesday, 9 January 2013

Making: Christmas presents for children

Hello friends.

Christmas is very over. So over that the decorations are boxed up, the tree keeps staring at me from the ginnel* and making me feel guilty (I feel like I have 'tree murderer' tattooed on my forehead), and I've started thinking about next Christmas! Oh, you don't do that too? Time to bow my head in shame and skulk into the corner.
 
But if you do think of the next Christmas to come, and all the things you meant to do this year and didn't get around to, then I'll show you some of the childrens' presents I made. In fact, they're great things to make for birthdays all year round, so let's forget the embarrassing pre-pre-Christmas planning and show you some pictures...
 
I made this monster drawing tote for a friend's little boy. Don't you just love the crayon teeth?! Sadly, I can't take the credit as I saw a similar bag on pinterest and decided to make my own version. Here's the original, made by Marigold of Hideous! Dreadful! Stinky!
But then, feeling pretty inspired, I decided to make a monster-less pretty bag as well. I used some lovely Jemima Puddle-Duck fabric. All the bags I made have a sketchbook inside that I made just the way you did back in primary school - thick thread, running stitch down the spine to hold the pages together, hey presto!

The totes are fully lined (in a brushed-cotton baby blanket that once wrapped all three of my boys in turn) and came together in an hour or two. The felt crayon pockets took quite a while on top of that though, although annoyingly I've now seen that the original monster bag tutorial (which I hadn't seen at the time) has a much easier and quicker way to sew them. File that for next time!
 
I have more pictures to show you (the Christmas that keeps on giving) but they can wait until next time. 
 
*Ginnel: northern term meaning a passageway between houses

Thursday, 3 January 2013

Making: Christmas presents for friends

I thought I'd divide my Christmas making up into three posts: for friends, for children, and for family. I'd love to say I had a clever reason why. I just don't have photos of the family gifts yet, so I'm stalling.
 
Firstly, I know this is slightly bonkers in a 'I'm Pretending I'm a Perfect Mamma' kind of way, but we made our own wrapping paper. Kraft paper (cheap! tasteful! rare combination!), green paint, a big potato and two very messy kids. That's the Tiny One's hands there (not so tiny any more). And mine. I was going for the nice geometric tree print. The Tiny One was going for the wahey-let's-rub-that-green-potato-tree-everywhere look. He won.
Secondly, here are the bags I made for three special chums. I'd like to point out that this was my first time using a zip and it was just the same experience as my first time making souffle - came out fine, couldn't work out what the fuss is about. I think it was more luck than skill. But I love them. That mauve bottom left is from a corduroy dress from Clothkits that I wore at about age 6. I'm a sentimentalist, I know it.
I asked my friends for their favourite colours, which is how I ended up with these prints. All the bags were made using this pattern from Noodlehead. The blue print is from Amy Butler's Soul Blossoms range - Temple Tulips in azure. The whole sheet of fabric looked beautiful draped over my sewing chair. I think it would be fabulous in a large-scale upholstery project. The yellow fabric is one I've used before for a hanging wall pocket, but I can't find a photo of the project or a picture of the fabric online, so it'll have to remain mysterious. I love how autumnal it is and the contrast of such a spring-like interior.
I'm really pleased with those interiors. They really take the bags up a notch. I used the same prints for the zip tags. I keep having to remind myself to say 'zip' - I read so many American sewing blogs that I keep starting to say 'zipper'.
I also made this fabric necklace, inspired by this pin of a // Between the Lines // project. Hers is much better though. I planned to make one for each of my friends but ran out of time - sorry ladies, IOU!
Inside each bag was a felt single-string Christmas mobile in the colours of their Christmas decorations. Here are two. I really like them, even though they're simple. They looked lovely hung from my front window while they waited gifting, and I could quite happily have kept them.
That's me done for now. I had a sore throat yesterday, a terribly sore neck today, and I think a lurgy may be lurking. My mum and auntie are coming tomorrow (hooray!) so now I need to go and finish up some sewing and clean the bathrooms (not hooray).
 
PS I'm thinking of redesigning my blog again and going back to the old-school, scroll-down-for-each-post look. What do you think?
 

Wednesday, 7 November 2012

Toddler's builder's belt tutorial

Surely I'm not the only person out there with a sewing machine and a number of very little builder friends?! I've made three builder's belts in the last few months, and I figured a proper tutorial was in order for any other little builders out there. I've never written a tutorial, but I'm not afraid of something new so let's go!...
 
 
This belt should fit your average 2-4yr old with room to grow. The pretty belt above was my first attempt, which is why there's a pocket on either side of the belt's velcro 'buckle' and some tool loops too. When making more, I found it better to have the loops on one side and the pockets on the other, which this tutorial shows you how to do.
 
1. Cut out your belt fabric. Use something thick like canvas that won't require any interfacing. Cut one strip of 66cm x 10cm. This will be your belt. If you have a toddler waist nearby to measure, measure it and adjust accordingly! You need a decent overlap for a long-ish piece of velcro that will allow for growth. Cut another piece of 26cm x 9cm and another of 26cm x 6cm. These will be your tool pockets.
2. Fold your longer, belt piece in half along its length and press with your iron. Fold both of the shorter ends in by 1cm each, press and then sew to secure.
3. Now for your pockets. Fold over 1cm of a shorter end on both, press and sew down. Then fold each piece in half to make a pocket, and adjust so that you have 4cm of fabric exposed at the top as in the picture. Press with an iron. Make sure your sewn hem faces outwards.
4. Now, sew down each side of the two pockets with a 0.5cm hem, making sure you backstitch at both ends and that the backstitch at the pocket top runs right over the hem fold. Remember, clumsy toddler hands will be trying to force hammers into these pockets!
5. Turn your pockets inside out, using a knitting needle or similar to get into the bottom corners. You will notice that just above the pocket top the single-width fabric naturally folds over at an angle.
6. Press your pockets with an iron, pressing the natural angled folds at the top of the fabric too (see picture). It doesn't really matter where the tops of these folds peter out, just that they match on both sides of the pocket (in my case, there's about 1.5cm unfolded fabric left at the top). Then use a zig-zag stitch on these folds to secure them and prevent fraying. Make sure you don't sew onto the pocket part itself. There must be a better, neater way to do this but I'm still too much of a beginner to know it!
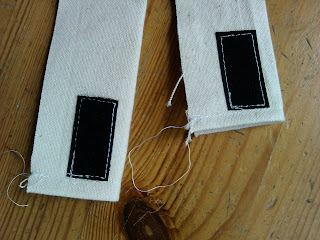
7. Now return to your belt fabric. Unfold it. Cut a 4-5cm piece of velcro, separate and sew one part in place about 0.5cm below the long fold on the belt at one end, and just clear of the hem on the belt end. Do the same at the other end of the belt with the velcro twin, but on the other side of the long belt's fold. I.e., make sure your velcro matches up when belted (one piece visible on each side of the belt). Sorry, this is a bit hard to explain so I hope it makes sense! Have the scratchy side of velcro facing outwards from the tummy so that your toddler doesn't get scratched by it.
8. Right, let's make the tool loops for the belt. Get a new, contrasting piece of ordinary fabric that's at least 40cm long and 10cm wide. Fold it in half longwise, press, and fold each half in half again towards the middle and press. All the folds should face the same way - see photo! You won't necessarily need use the whole length of fabric in the end, but you can't know how much you'll need until you start sewing.
9. With the fabric folded up, sew along the open length to make a quadruple thickness length of fabric. You needn't sew up the short ends: we'll be sealing them in a minute.
10. We're going to start sewing the tool loops in. Place your canvas belt flat down, unfolded and with velcro facing up. Fold the end of your coloured fabric over by 0.5-1cm, place on the belt about 2cm from the end of the velcro (so that, when worn, the other end of the belt doesn't touch it) and just below the long belt fold line. Make sure your coloured fabric runs parallel to the canvas belt. Also make sure your long seam on the blue fabric faces down so tools slide in unimpaired. Sew down.
11. Time for your judgement. I can't give you measurements here, but just allow a nice loop that will hold a tool, sew another parallel line down to hold it in place and keep going. Remember the loops need to be accessible, so don't extend them beyond where the child can reach back. I make the loops all slightly different spacing and tightness to allow for different tools. If you have the toy tools to test as you go, lucky you! Once you have 3 loops, cut the end of the coloured fabric to the right size for your fourth loop then sew down.
12. We're almost done. Time for some assembly. First, fold the long lengths of your belt over to make 1cm hems and press with the iron.
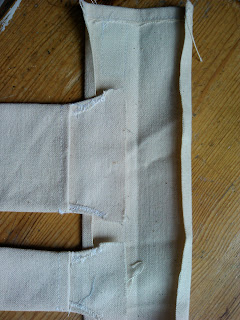
13. Now place your two pockets on the other end of the belt to the coloured tool loops you've just made. Place them inside the belt, 1cm down from the belt inner fold and with the first pocket 1cm from the end of the velcro on the other side of the belt.
14. Carefully holding the pockets in place, fold the belt down over them and pin in place. Mine were not as precisely measured as yours will be, hence being slightly different lengths! Now you need to finish the assembly by top-stitching the whole belt: sew down the short end of the belt then all along the length and up again. Your topstitching will seal both the pockets in place and should just skirt the bottom edge of the coloured tool loops.
15. It'll help you to see the whole thing. From left to right: non-scratchy velcro on the other side of the belt end; then two pockets; then a gap where the child's back is; then the row of tool loops; then the velcro facing upwards at the other end (just visible). And yes, that's my shadow in the bottom right corner. I'm such a masterful photographer (insert sarcasm here).
Shall we have a look at the belt all assembled and fastened?
How about from above? Or with tools in?
And for good measure, let's have a few looks at the first belt too.

There you go. I do hope your little builder enjoys it!


Wednesday, 31 October 2012

Trick or treat

 
Completely useless title for this post: yes, it's Halloween; but no, I've nothing Halloweeny for you. Patience my friends! I am, however, showing you a statue from Chatsworth that I think would make a fabulous costume... one to hold in the bank until the kids are bigger I think. It's a Barry Flanagan sculpture from an exhibition that has just ended. We loved it.
 
Anyway, to business. Shall we catch up on some sewing? I was a bit poorly in August, but September saw the following creations:


More name bunting, for another new arrival. I couldn't tell you what all the fabric is anymore, though I hope you'll recognise Miffy in the 'O'. The red check is from Ikea and the beautiful green tigers behind bars are from Eleanor Grosch's Zoo Menagerie collection, which I purchased here.
I also made a 'man bag' (for want of a better term - yes, I know the better term is messenger bag) for my littlest brother. It is the best thing I've ever sewn, technically speaking, and the pattern was from Mollie Makes issue ten. The original design was quite 'shabby chic' but that won't do for a non-shabby man! So I went with some masculine Ikea fabrics with a hint of deckchair about them.

 
I'm especially proud of the lining and the inner pocket. Now here's the embarrassing confession: I've not sewn an inner pocket before. Or a lining for a bag. Or curved corners. Or, wait for it...


A buttonhole. But now I've done it all, I'm hoping I can progress from novice sewist to beginner sewist. Only 43 more rungs to climb then! (Oh I wish I could say I was daunted but actually I'm desperate to get back on the sewing machine. I'm quite pathetically addicted).

Monday, 6 August 2012

In which I sew some gifts for children

It appears my sewing mojo has returned with a little bunny hop...


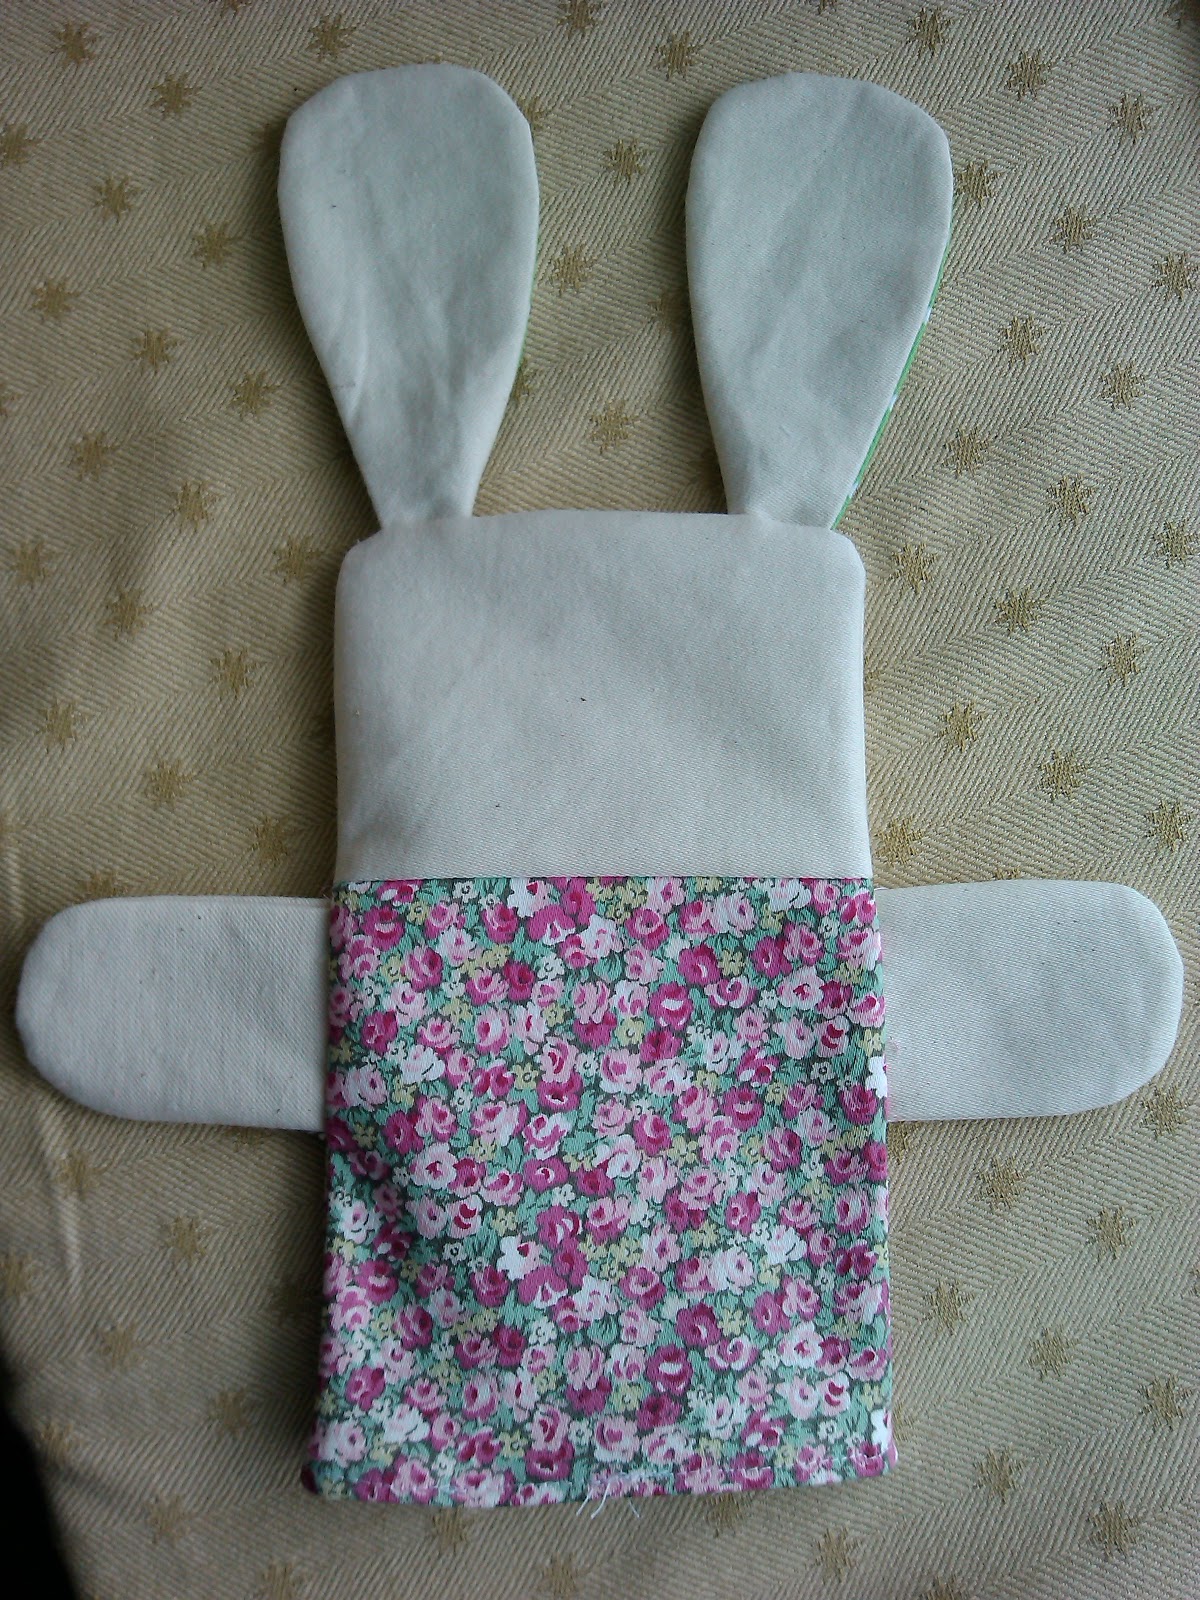
I made this little rabbit puppet for a one-year old. Unusually, I made it from a pattern, found in this book by Ellen Luckett Baker of The Long Thread blog. I loved making it, though it took ages and hand-sewing those arms in with two rounds of running stich and an overlock stitch took the longest of all! Still, I'd gladly make another one. It's just so lovely.


Goodbye little bunny - this one has already left for its new home.


I also made some name bunting for a friend's new little boy. I was inspired by Mary Emmens' name bunting, but made it up myself as I went along. To stop the letters fraying and to give them more structure, I used bondaweb. The back (unseen) is leftover blue sheeting from my play house project. The front is a mixture of new, old and very old fabrics (in fact the 'N' is from a dress I wore as a girl!). It has a sort of sky/moon theme to it. I'd love to make some for my boys too. Yet another thing to add to the I-meant-to-make-it-but-I'll-never-get-around-to-it list!


And lastly, for a special little girl turning three, I made her a birthday crown. She has a lot of inner princess, so I hope it suits! It has medium-weight interfacing inside for structure, as well as upholstery-weight fabrics (gosh I do love that pink spot). I thought about adding beads to the points to make it a bit more regal, but she has a little sister (she of the bunny-gift above) and I didn't want to make the crown too tempting to a one-year-old's mouth!


So there we go. I'm heading back to my sewing corner now to work on some UFOs (unfinished objects) for, shock horror, our house! It's lovely making gifts but it's a real treat to sew something we can keep.